Category: Tropical Style

The Way to Grow Blue Enchantment Convolvulus

Blue Enchantment Convolvulus is a stunt glory famous for the color of its blossoms — a stunning blue with yellow centers surrounded by white. Considered a perennial in U.S. Department of Agriculture zones 9 through 11, it is used as an annual in cooler areas, so how well it grows for you depends on which Bay Area microclimate you live in. Blossoms appear in early summer and continue into the fall, staying open throughout the day and attracting hummingbirds and butterflies. A plant certain to improve the curb appeal of a home, Blue Enchantment Convolvulus is suitable for use as a bedding plant, hanging baskets and in pots.

Locate a bright location by amending clay or sandy soil with organic matter and prepare the soil, if necessary. Plant seeds directly into the garden in early spring and thin to 12 to 18 inches apart when 2 to 3 inches tall.

Fertilize with a fertilizer. Cut back on fertilizer in case the plant is currently getting with few flower buds.

Water plants regularly, keeping the soil moist — approximately 1 inch of water weekly. Watering with the usage of drip irrigation or a soaker hose is efficient and helps to conserve water.

Eliminate blossoms that have faded to encourage new flowers. If they become leggy or tall to promote growth cut stems back.

See related

Information About Deodar Leaves

Tall, lush, cone-shaped deodar cedars (Cedrus deodara) possess feathery foliage. Deodar cedar grows in U.S. Department of Agriculture plant hardiness zones 7 through 9. These trees may grow very tall, frequently putting on 30 feet of increase in no more than 10 years, so they’re ideal for bigger yards where the full majesty of the form and leaves may shine.

Leaf Attributes

Evergreen, needlelike leaves grow in a whorl encircling and traveling the length of each budding branch. Each leaf needle measures approximately 2 inches long. You will find 20 to 30 needles in each whorled cluster, providing the deodar tree its dense foliage. Leaf color fluctuates depending on the cultivar, but many varieties are medium to dark green. “Aurea” deodar, which rises in USDA zones 7 through 9, produces yellow foliage, while “Kashmir,” which grows in zones 6 through 9, attributes silvery-green leaves.

Landscape Tips

Deodar, like most cedars, has exceptionally fragrant leaves and bark which adds a pleasant scent to your lawn. The mixture of year round colour and a well-balanced form, even without pruning, makes this tree a standout. Even though this tree can grow 80 feet or taller with a spread of 40 feet, annual pruning can keep it in a shorter height more suitable for a lawn. When pruning, disinfect the shears by wiping them with an isopropyl alcohol-soaked cloth. Cut just into green, leafy wood. Pruning woody stems which are no longer generating leaves results in bare patches in your tree.

Cones and Catkins

Nestled in the leaves, the green 3-inch-long cones mature to brown and also hold the seeds to your tree. Each cone stays on the tree for approximately two years before releasing its own seeds, hence that the cones are a year feature on most deodar cedars. Newly emerging leaves in spring are far lighter than the old needles, usually a striking silver-blue which provides a colour contrast. The tree also creates long pollen catkins in spring. These discharge yellow pollen, which may leave deposits on exterior furniture or parked automobiles under the tree. Seasonal needle drop is not heavy, however, the large cones can give rise to a litter issue.

Care Factors

A site with all-day sun provides for healthier growth and the very best leaf look. Deodar trees are drought-tolerant and rarely require watering, obtaining all of the moisture they need from rainfall and encompassing landscape watering. The tree doesn’t require fertilizer and may prosper even in poor soil in the event the site drains well. Pests, such as borers, weevils and scales, may sometimes infest a deodar but controller is not essential. Diseases seldom cause problems, although foliage dieback near the top of the tree might happen if there is a frost.

See related

Northeast Gardener's February Checklist

Last year I had a Valentine’s Day celebration with garden buddies and asked everyone to bring some a favourite book to discuss. It was a hit. We laughed and had good conversations as we compared stories and experiences — crops that had bombed, issues with this or that, successes, favored colors and varieties of tomatoes or zinnias. As you probably already know, gardeners like to share, and colorful catalogs were strewn all across the table at the end. Here are some more ways to indulge your passion and beat the winter blues.

More regional garden guides

Paintbox Garden

Fill out your rooms with fragrance. It is accurate: Aromatherapy does help soothe away stress and make you feel better. It is not too late to grow paperwhite narcissus — it is supereasy along with being fragrant. Look for it in garden centers and get a bag of polished stones in a crafts store to grow them with.

Keep bulbs in a cool, ventilated area and pot them up every couple of weeks for nonstop blooms.

Paintbox Garden

To grow paperwhites with stones, anything will do. It is interesting to use interesting vessels, in this way ice bucket, which displays the impressive root expansion around the supporting stones.

The water should come only to the base of the bulbs. In roughly two to three weeks, then they will blossom and fill your house with a new, sweet scent. Hyacinth bulbs can also be easily grown in water.

Paintbox Garden

Visit a greenhouse. A visit to a garden centre or tropical climates this month is crucial. Among my favourite scented crops, white (or pink) jasmine (Jasminum polyanthum), includes a fragrance that transports you to the jungle — entirely heavenly.

An evergreen vine indigenous to China, jasmine makes a fantastic houseplant for a sunroom; give it indirect light and cool temperatures (approximately 60 degrees Fahrenheit) for optimal flowering.

Paintbox Garden

Drench your house with color. Hothouse crops, like this lush orchid, surprise that the senses — it is impossible not to feel energized by the visual punch of these voluptuous tones, the most complex variations of color and the curvaceous petals that capture the attention.

Catch some orchids and place them around your house. They’re dignified enough for the dining room and also ideal for a steamy bath.

Paintbox Garden

Relax by a fountain. It is no surprise that the oldest gardens of Persia were courtyards surrounding pools. The sound of running water flow through leafy plants is intensely curative on a bitter-cold moment. As you’re enjoying the fountain, then examine the displays. It is amazing how easy it is to earn a water feature with all the container options available.

Paintbox Garden

Water treatment is good for the spirit, too. We need to develop energy for the garden work that lies ahead (let’s not think about that right now), and just take a couple of minutes to sit and enjoy an indoor garden conservatory is among the nicest things you can do at this time of year. Bring a notebook and make some plans for the forthcoming season, throw some pennies into a swimming pool and make a wish.

Paintbox Garden

Love winter beauty. Branches, berries and bark comparison with evergreens to give winter gardens visual punch. Among the very best crops to grow for winter and wildlife shade is winterberry holly (Ilex verticillata), a U.S. native that’s greatly valued in the home landscape because of its reddish berries.

Paintbox Garden

For Northeast gardeners, winterberry holly is a versatile tree to understand and utilize, as it is adaptable to varying soil conditions and easy to grow in full sun. Plant some at a mass to get the complete impact of its persistent fruits, which stand out in winter snow and are favored by birds. The plants are dioecious, so you’re going to need a male plant to pollinate the females and assure decent fruit set. The cultivar’Sparkleberry’ makes a fantastic wildlife screen in a naturalistic setting.

Paintbox Garden

Update your patio furniture. New seat cushions or pillows in vivid colors can alter outdoor furniture that is weathered from years of use. Take a look at what’s available locally and assess online for options in bold stripes, solids or patterns. It’s possible to get a brand new style for a patio or porch without having to spend a lot.

Paintbox Garden

Midwinter inventory sales are in full swing, which signifies deals on all sorts of things. I discovered these fabulous rockers discounted in my local garden centre on a recent excursion. Love the blue.

Paintbox Garden

Get organized. With our houses lying dormant beneath blankets of snow (it was below zero here now ), use this downtime to get your gear organized. Gardening is a messy business, and also our footwear takes a beating. Perhaps it’s time to get a set of colorful new clogs?

Paintbox Garden

I adore these tubs. They grip tools and garden gloves, and are fantastic for lawn cleanup when you are working in a small area. Everyone has stuff to haul and store, and these tubs are versatile and tough. And did they mention that they also make ice buckets for garden parties?

More regional garden guides

See related

Fantastic Houseplant: Holiday-Blooming Cactus

Simply because this plant loves the spotlight around the holidays, don’t forget to enjoy it year-round — its striking form and foliage are tough to find in any other plant. You might be wondering why I am writing about Thanksgiving cactus. The solution is: as what most people think of as Christmas cactus, and also exactly what most nurseries promote as Christmas cactus, is really Thanksgiving cactus. True Christmas cactus (Schlumbergera bridgesii) is quite difficult to discover, so the more easily accessible Thanksgiving cactus (Schlumbergera truncata) was dubbed Christmas cactus.

Now our semantics are cleared up, here’s what you need to understand about this omnipresent holiday plant.

J. Peterson Garden Design

Botanical name: Schlumbergera truncata
Common title: Thanksgiving cactus
Water requirement: Typical
Light requirement: Vibrant light until early autumn
Mature size: 12 to 18 inches tall; cascades over the edge of a pot
Benefits and tolerances: Normally pest and disease free
Seasonal attention: Profuse blooms from late autumn through January

J. Peterson Garden Design

Planting notes. Here is where this holiday-flowering cactus becomes tricky. There’s a secret to obtaining these crops to rebloom every year, and I share this trick with one consideration: I know lots of folks, myself included, who do nothing special to their Thanksgiving cactus and are still treated to annual flowering.

That said, traditional guidance for these crops is to give them bright, indirect light (on a covered terrace or through a glowing window) until September or October. At that point, it’s suggested to decrease the light to about 10 hours a day for 20 to 25 days.

Put a box or bag carefully over the plant from 6 to 8 pm or place it into a darkened garage throughout those hours. This imitates the short day cycle that’s necessary for all these crops to set buds for vacation flowering.

Once the buds begin to set, improve watering and bring out the container to a brightly lit place for holiday display, but not allow the plant sit in soggy soil.

Rikki Snyder

Distinguishing traits. Thanksgiving cactus and Christmas cactus are both flat-leaf cacti native to the tropical forests of Brazil, but they’re different in subtle ways. Thanksgiving cactus has pointed or claw-like stem endings, while some of the Christmas cactus are rounded.

Thanksgiving cactus also begins to bloom earlier, putting buds out in mid to late autumn with blossoms in white, fuchsia, pink, red and salmon. Most plants bloom profusely from about one month before Christmas until later in January or even into February.

J. Peterson Garden Design

The best way to utilize it. Plant this vacation bloomer in containers of festive colors (green, red, silver) and show it with different houseplants or other seasonal blossoms, like poinsettias or cyclamens.

If you reside in a really mild place (zones 9 to 11), you may have the ability to depart this plant outside on your patio throughout the season. The rest of the zones should aim to exhibit this plant indoors during the colder months.

See related

Cool-Season Vegetables: How to Grow Beets

If you understand just canned beets, then beets from the autumn or spring garden is going to be a surprise. First, they are available in different shapes, from around more oblong, and a range of colours. You can also find yellow, gold, white or striped, although there is the traditional deep red. Even the leaves and stalks are some reds and greens. Sauté the leaves as a green, and then delight in the roots in salads, in soups (who doesn’t understand of borscht?) As well as a side dish.

More: How to grow vegetables in autumn and spring

The New York Botanical Garden

When to plant: Sow seeds in early spring to harvest beets in late spring or early summer. In mild-winter climates, you can plant them at the end of summer and in autumn.

Days to maturity: 45 to 65

moderate requirement: Full sun to partial shade

Water necessity: Frequent water

Favorites: Big Red, Bull’s Blood, Chioggia, Crosby’s Egyptian, Cylindra, Detroit Dark Red, Formanova, Golden, Gladiator, Green Top Bunching, Little Ball, Little Mini Ball, Lutz Green Leaf, Red Ace, Ruby Queen, Sangria, Sweetheart, Yellow Detroit

Robin Amorello, CKD CAPS – Atmoscaper Design

Planting and care: Be sure the soil drains well and is free of rocks and lumps, and which may hinder root development. Keep sowing each month and fall to ensure a harvest. Plant seeds about an inch apart and cover with a quarter inch of compost or vermiculite.

Robin Amorello CAPS – Atmoscaper Design

When plants are small, combine care and harvesting from thinning the plants to about 2 inches apart and ingesting both roots and greens. Keep the soil moist until the seeds germinate, then keep to maintain the garden well watered. Mulch will help keep the soil cool.

Pests aren’t many, but you may attract some beetles, leafhoppers, leaf miners and wireworms. Rotating the crop will help keep problems to a minimum.

Jocelyn H. Chilvers

Harvest: After thinning, crop beets when the cap of the origin is roughly 1 inch wide. Don’t let them get too large; roughly 3 inches is as big as you would like. In cold-winter ponds, complete inside all harvesting before very cold weather sets. Or, if you would like, pay the plants with approximately a foot or so of hay and straw to keep the ground from freezing and keep to harvest as long as the crop remains.

More: How to grow vegetables in autumn and spring

See related

Great Design Plant: Ginkgo Biloba

If you believe “stinky berries” once you hear the term “ginkgo,” please keep reading so I can try to modify your preconceived ideas about this beautiful tree. It is accurate — fertilized female ginkgo trees of a certain era will sprout fruit that, quite frankly, smells just like a trash dump. However, you can avoid this entirely by ensuring you plant a male tree.

Think about the fact that this historical tree was around during the time of the dinosaurs, which Buddhist monks have revered and planted ginkgos in contemplative temple gardens for thousands of years. Let those details marinate and boost your appreciation. Then find out more about this unique tree beneath and replace your thoughts of foul female berries with those of gold fan-shaped leaves.

The New York Botanical Garden

Botanical name: Ginkgo biloba
Shared title: Ginkgo tree, Maidenhair tree
USDA zones: 3 to 2 (find your zone)
Water condition: Soil ought to be well-drained.
Light demand: Full sun to partial shade. Full sun is suggested for the best.
Mature size: At the largest cases, over 100 feet tall and 60 feet broad; though more commonly anticipate around 70 feet tall and 30 feet wide.
Benefits and tolerances: Infection, pest and urban-pollution free. This really is a long-living tree you must plant with the notion of leaving a legacy behind.
Seasonal interest: The leaves turn to a beautiful golden yellow in the autumn. They fall off nearly creating a golden carpet on the floor beneath the back. Keep the leaf-blower tucked off and love it.

When to plant: Spring or fall

Ginkgo Leaf Studio

Distinguishing traits. The green leaves are a delicate fan shape that’s so pretty and distinguishable it is frequently rendered in decor, whether on a cushion, wallpaper print, bronze or tile sculpture.

While the full-grown ginkgo has a lovely shape, youthful specimens go through an awkward and gangly adolescence, using odd branching patterns along with a rate of slow development. Following a couple of years, they begin to fill out and grow at a moderate rate.

The sensational golden yellow fall color is motive enough to plant this tree.

Ziger/Snead Architects

The best way to use it. The ginkgois a distinguished speciman tree that stands out in a landscape. While it’s a magnificent tree to plant independently, it’s also wonderful in a grove or in a courtyard, and because of its tolerances, it creates a fantastic urban street tree.

The tree also has become a symbol of longevity, endurance and hope; those meanings are factors to consider when planting it.

WA Design Architects

Here the early tree looks sculptural, its irregular form contrasting with the straight lines of the contemporary architecture surrounding it.

Ginkgo Leaf Studio

Planting notes:
Dig a hole about 5 inches larger than the root ball on either side.
• Ginkgos like sandy loam, so if your soil is not sandy loam, spread sand on the bottom of your hole.
• Place the rootball in the hole and fill out the sides with sand.
• Keep turf a few feet away from the trunk.
• Water your tree, but be careful not to overwater.
• Ginkgo tree growth could be erratic, so don’t worry if it hasn’t grown, provided that it seems healthy.

The New York Botanical Garden

Fun facts. Google “ginkgo biloba” and you will get a ton of medicinal info. The plant was used to deal with a assortment of ailments for thousands of years. In Eastern medicine these include asthma, indigestion and bronchitis.

According to the Mayo Clinic, the plant has proved effective for treatment of “intermittent claudication Alzheimer’smulti-infarct dementia and cerebral insufficiency.” It also has been researched as a remedy for suffering from altitude sickness to PMS. You’ve probably heard of it most recently as a memory aid; scientists are still analyzing the efficacy of this use.

See related

Containers Make Growing Edibles a Cinch

With all the focus on buying locally sourced food nowadays, it’s easy to get excited about buying new produce close to home. And what’s more local than your own backyard? One of the most convenient, functional and attractive methods of going local is planting veggies and herbs in containers. Done right, they can become a focal point element in your landscape design.

The key to success in growing crops in containers is picking the appropriate plants, the right pots and the ideal place, and supplying the right care. Here, six essentials for edible gardens and how to use them.

Exteriorscapes llc

1. A container. It has been stated that when choosing a container, you are limited only by your imagination and a drainage hole. Proper drainage is essential, as edibles do not like wet roots.

Here, chives, oregano and other herbs grow in a custom steel planter using two layers of planting area and plenty of drainage right into a gravel courtyard.

Beertje Vonk Artist

Window boxes are a lovely and effective way of growing small edible plants like herbs and greens, especially in urban settings with little if any yard. Pictured here are pansies, that have edible flowers.

The Gardensmith

Size matters when it comes to containers for edibles. Most vegetables have quite large root systems that require pots to be deep and broad. Plus, larger containers will not dry out as quickly, making it easier for you personally and less stressful for your plants. Find baskets at least 12 inches broad and heavy; 16- to 20-inch pots are much better.

Amy Renea

2. Seeds or plants. Generally, it is easiest for beginner gardeners to purchase plants instead of start from seed. The exclusion is root vegetables, that do not like to be transplanted. If carrots and beets are your favorites, then sow these directly in your pot following the seed packet directions.

With the popularity of container gardening rising, many growers and seed companies are offering varieties of veggies specifically for growing in containers. These kinds are practical for smaller pots, but you might have the ability to use regular-size varieties if you’ve got a container that is large enough. By way of example, a solitary standard-size tomato plant would be happy in a container at least 20 inches deep and broad.

decordemon

3. Soil. One of the biggest benefits to growing edibles in containers is that you can use a high quality potting medium to help ensure success. Locate a potting soil that’s specifically devised for containers. Wet the soil well and allow it to drain before adding your plants or seeds. This helps to ensure that the soil will not wick moisture from the plants you’re incorporating.

4. Fertilizer. At the time of planting, include a granular, slow-release fertilizer that supplies the proper nourishment within 3 to six months. Because edibles are heavy feeders, you can even supplement with a liquid organic fertilizer twice per month.

Kim Gamel

5. Water. One of the most crucial responsibilities in container gardening is watering. The key here is moist yet well-drained soil. Drip irrigation is the best method for accomplishing this. If you’re watering by hand, you will need to water once every few days once the weather is moderate, and at least once every day if temperatures are at their peak.

If you water only once every day, choose the morning so that there is less opportunity for fungus to develop. For the same reason, it is also best to water the base of the plant instead of the leaves.

decordemon

6. Sun. Most edibles will work best in full sun, so choose a spot that gets at least six hours of sunlight daily, even in the event that you need to move your pot to achieve it. Placing your pots on wheels makes this simple.

Kim Gamel

Tend to a containers every day if at all possible. Pick herb leaves throughout the growing season, make sure you snip the tops to keep them from going to seed (setting flowers). Harvest vegetables whenever they have gotten to the size you want. Deciding them early and frequently will help to keep the plants productive.

Oh, and one more thing: patience. With a little time and effort, you will be rewarded with all the fruits of your labour. There’s barely a more satisfying sense than choosing a ripe vegetable from a plant you’ve nurtured.

Best of luck, and I want to know in the Comments section the way your edibles are growing!

See related

Colorful, Casual Vacation Home

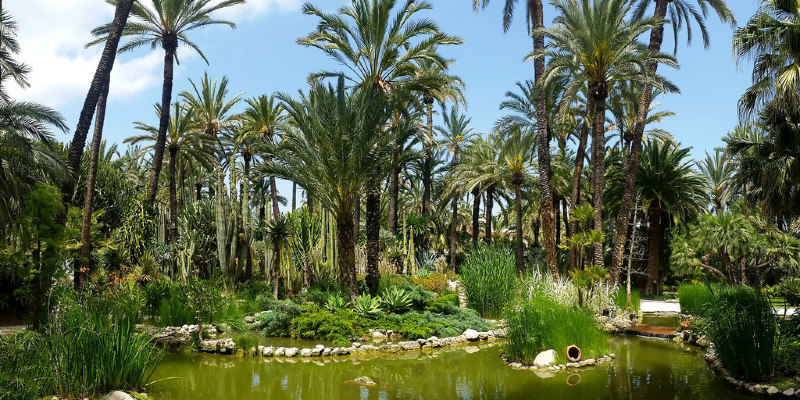
Front and rear lanais decorated with twinkling string lights, open living spaces full of natural light and a soothing blue and green colour palette come together in this cheerful tropical getaway for a busy California couple. With five business locations throughout Maui and Oahu, Hawaii, the couple reached out to designer Natalie Younger to design a relaxing house for them to retreat to.

Younger functioned from Los Angeles, selecting a team in Maui to perform her vision. Employing a tropical palette with modern patterns and toned-down colors, Younger generated a house which emanates island existence while still feeling comfortable for a few of mainland roots.

at a Glance:
Location: Maui, Hawaii
Who lives here: A California couple, on holidays
Size: 1,600 square feet; 3 bedrooms, two baths

Allied ASID, Natalie Younger Interior Design

Open lanais in the front and rear of the house stretch the interior footprint and adopt the island’s indoor-outdoor relationship. While the clients wanted this home to have the familiarity of home, they wanted it to have the playfulness of a holiday house too. Younger used bold, tropical colours that feel right at home in Hawaii.

Wicker furniture: Bali; cushions: custom

Allied ASID, Natalie Younger Interior Design

Nothing beats living right on the shore, but the constant sand can make cleaning a hassle. Younger installed simple hardwood flooring to produce sweeping easy and put a tightly woven carpet in the bedrooms for a cozier feel.

Allied ASID, Natalie Younger Interior Design

All of the home’s furnishings were treated with a nontoxic coating to prevent the stains, spills and wear and tear which come with beachfront living. Younger had the outside cushions and pillows made with Sunbrella fabric for durability against the elements.

Natalie Younger Interior Design, Allied ASID

Toned-down blue and green colors pay tribute to the home’s stunning surroundings. Linen curtains and bamboo Roman shades donate to the relaxed ambience. A starburst clock adds a little bit of glam to the simply adorned walls. “Time isn’t necessarily accounted to the island, so the clock has been more of a decorative piece,” says Younger.

Paint: Taliesin Blue, Dunn Edwards

Natalie Younger Interior Design, Allied ASID

The L-shape kitchen sits just around the corner in the dining area. Because this is a holiday home, the clients wanted to keep the kitchen simple and economical. A collage of their customer’s photographs of favourite spots in Maui hangs on the walls, and wallpapered open shelving supplies character.

Natalie Younger Interior Design, Allied ASID

A shell chandelier has been the perfect match for the dining area. Grass cloth walls meld with rattan chairs for added texture. Younger and the clients had a hard time finding simple but brightly colored art that would do the job for the house, so Younger designed and painted the home’s wall art on her own.

Table and chairs: Bali; chandelier: Capiz, West Elm

Natalie Younger Interior Design, Allied ASID

The custom-made sofa was filled with premium fill to get an extra-cozy feel. “After a long day at the shore, there’s nothing better than coming home and lounging on the sofa,” says Younger. Unique accent pieces, such as the custom made cushions and trunk out of Bali, are great tropical touches which would nevertheless feel at home in California.

Rug: Facet Citrine, DwellStudio; sofa: custom; sconces: Jonathan Adler; mirror: Pier 1; coffee table: Pampa Furniture; fan: Artemis Natural Maple

Natalie Younger Interior Design, Allied ASID

The home’s floor plan gets rid of closed-off spaces — the kitchen, the dining area, the living area and the outside rooms all run into one another. Plentiful windows and doors allow in fresh air and light. “it is a space that lives two lives,” says Younger. “At the day, light and the island views become an addition to the total design. But at night, when all the light is put and dimmed, it gives an ambience which allows for extended and unforgettable dinner nights with family and friends.”

Natalie Younger Interior Design, Allied ASID

Both the clients and Younger comprehend the value of good lighting, so they put new fittings into virtually every area in the home. Modern sconces dress up the living area walls, whilst bulb string lights and lanterns extend the shine outside.

Natalie Younger Interior Design, Allied ASID

The master bed is a real item from Bali. The woven headboard adds warmth and texture into the straightforward and soothing area.

Bed frame: Bali; wall paint: Hot Springs, Valspar; bedding: West Elm; table lamps: Pier 1

Natalie Younger Interior Design, Allied ASID

Having additional space for guests has been important to the clients. A guest bedroom includes ample area for couples staying overnight, and the custom built in the living area is outfitted with a pullout bed.

Designing the house from overseas presented challenges for Younger. She is onsite only for the first belief and final touches. Fortunately, she found an awesome team in Hawaii which would be her eyes while she was not there and made sure the design was executed exactly as she envisioned it.

Wall paint: Salisbury Green, Benjamin Moore; bedding: DKNY

See related