Month: April 2018

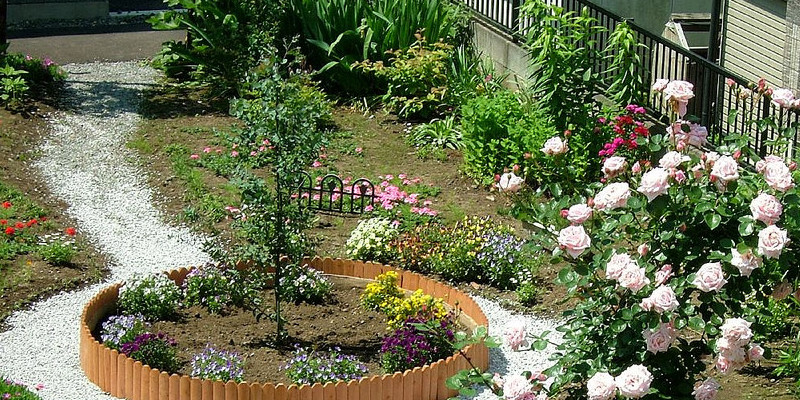
Companion Crops for Radishes

Companion planting is an age old practice that enables Nature to lend a supporting hand in the backyard. When specific crops are developed along with one another, they are able to do every thing from fending off to enhancing development and the flavor of veggies, bugs. Radishes increase in USDA hardiness zones 2 and are an outstanding companion for a lot of plants, creating a useful and delicious addition to any backyard.

Chervil

Chervil, a flavorsome herb makes a useful companion plant for radishes. Chervil is a a family member of parsley and has leaves that are green, having flavor and a gentle scent . The style of chervil is most useful if it is consumed clean though it may be utilized dried. When planted along with radishes, chervil normally betters development and their style.

Cucumber

With both veggies benefiting each another, crunchy cucumbers make an excellent companion plant for radishes. Cukes are kept by radishes free of rust flies and cucumber beetles that are hungry, with no need for pesticides that are toxic. Cucumbers, to another hand, enhance the development of radishes. Both radishes and cucumbers require plenty of sunshine and free, well-draining soil, therefore do not plant them in a shady place. Therefore consider developing them together as a trio that is delicious peas develop nicely with cucumbers and radishes.

Squash

Grow radishes along with spinach and squash to keep pests at bay. The larvae of borers make their way to the stem to feed of the squash, stopping water from killing the plant and flowing. Fortunately, these pests are repelled by radishes normally. It is also protected by radishes around spinach from miners, who as an alternative feast upon the leaves that are radish, while the edible root of the plant is left as well as the spinach is spared.

Bad Companions

Radishes are harmful to a few plants while planting radish along with specific veggies has several advantages, including protection from pests, better development and enhanced flavor. Do not plant radishes near cabbage or cauliflower, in addition to turnips and Brussels sprouts. Avoid planting radishes a herb employed in the manufacture of specific liquors as well as foods, next to hyssop.

See related

How to Tile a Bathroom

If you want to tile or retile your bathroom, it’s a good idea to hire a contractor that can provide excellent bathroom hardwood flooring San Jose.

However, if you are trying to save money and you believe that you can manage to do the task by yourself, here are some tips on how to tile a bathroom:

Symmetrical Layout

It’s common for tiling professionals to start tiling at one end and then work all the way to the other side. But this approach often leads to a weirdly sized tile in the end. This weirdly looking tile will stand out like a sore thumb making your bathroom look awkward. The best approach is to do it in a “center outward” direction.

Exposed Tile Edges

It’s common to see exposed tile edges in the bathroom. But there are several things you can do to fix this. Experts would recommend using the Durock tile backer board. This is a mold and moisture-resistant cement backerboard that’s ideal for use in the bathroom. The best thing about using this backerboard is that it will provide your tiles with a clean edge. After applying the board, paint the edge with the same color as the entire bathroom wall.

Backsplash and Cabinet

When doing flooring San Jose at the bathroom backsplash, it is often difficult to figure out how close the tile backsplash will be with the bathroom cabinet’s bottom edge. The best way is to place your bathroom cabinets after and ensure that they are installed in such a way that they hit exactly the top of the bathroom tiles.

This will require a lot of efforts. Another option is to cut out some slim pieces of the bathroom tiles in order to fill the gap. This is the best fix to this tiling problem.

Some tilers don’t take the gap in consideration at all. However, it doesn’t matter if there’s really a gap in that area because it rarely receives any kind of attention.

Grout

The grout between the tile and non-tile materials will sometimes look terrible. Grouting the area in-between will usually lead to cracking and will make your bathroom look less appealing. Instead, use appropriate caulk for that area between your laminate countertop and the bathroom tiles.  

Buy Quality Tiles

Always go for high-quality tiles when it comes to doing San Jose hardwood floors for your bathroom. Whether you are tiling backsplashes, bathtubs and other areas in your house that need tiles, always go for high-quality materials. Consider these tiles as your investment, something that you can benefit even in the long run.

Except if you are buying huge quantities of tiles for your bathroom tile work where the price can be a factor, do yourself a favor by buying the best bathroom tiles available.

The best way to Compost Pineapples

Despite the fact that the sunny yellow flesh of the pineapple (Ananas comosus) is sweet, a big section of the fresh fruit is inedible. Composting transforms pineapple’s difficult, spiny rind and stiff, spiky leading in to nutrient-rich substance that may be utilized in the backyard to enhance soil texture and fertilize crops. Kitchen scraps helps cut the quantity of rubbish and waste that ends right up in the landfill and helps satisfy any ordinances that are local with that objective. Peels and fruit are helpful for making compost that is well-balanced and high in nitrogen.

Rinse the pine-apple under a powerful spray of water in the drain to eliminate any pesticide residue on the outside the rind. Remove leading and the rind in the flesh that is edible .

The pineapple’s leading rind and core in parts between 1 and 3″ long. Parts that are smaller breakdown quicker. This can be particularly crucial since the thick rind and difficult leaves of pineapple’s generally take longer to degrade than composting supplies.

Store the pine-apple scraps, along with any un eaten or un-used flesh before you’re able to add it for your compost pile or bin.

Mix pineapple scraps and other materials with the equal quantity of brown supplies like grass clippings, vegetable peels or weeds. Materials like hay, leaves and pine needles include carbon, another ingredient that is essential to effectively produce compost.

Keep the compost location moist. Moisture is essential in wearing down the natural components to the end-product — compost to support micro-organisms.

See related

The best way to Paint Over Glazed Backsplash Tiles

When removing and replacing out-of-date, old or discolored tiles isn’t an alternative, consider painting them as an alternative. Tiles installed on dry wall places, including kitchen backsplashes, may be painted utilizing an oil-based or urethane-based paint. Choose one color or paint styles on each and every tile, or colors to to create a routine. Painting current tiles can start several design options in areas that might otherwise need function that is more invasive.

Clean the back splash tiles properly. Remove splatters, grease or any dirt which could interfere to the the top of tiles. Let the tiles dry totally.

Paint each tile independently with the oil-based or urethane-based paint. By utilizing a paint that includes urethane resin foundation or an oil, you’ll eliminate the need to get a primer. The urethane or oil resin functions just like a glue that bonds the paint right to the tile. Avoid latex paints, that may peel in the surface.

Use an angled brush to paint the edges of every tile. Hold the brush perpendicular to the medial side of stroke and the tile in and down toward the middle. Repeat for every single side stroke through the middle. Try to avoid painting the joints to provide a more practical result to the back-splash.

Let the paint dry completely seal the tiles using a urethane sealer. Paint the sealer onto the tiles with somewhat overlapping strokes. Many sealers dry using a slight gloss. Look in the tiles from a side angle to test for areas which could happen to be missed.

Paint the lines a shade to the tile colour that is new with an artist’s paint brush and paint. Paint the joints throughout in quick strokes. Paint that is grout will seal the grout, therefore there’s absolutely no need to apply an extra coat that is top.

See related

Tips for Redesigning Your Kitchen Countertops

Picking the right kitchen countertop is not always easy. There are many options out there and knowing which one is perfect for your unique kitchen can take days. But all you need is a few tips. Home design experts have often developed perfect strategies to help in kitchen remodeling and in this article, we are going to feature the opinions of some of the best remodeling experts when it comes to painters in Modesto, CA.

Without further ado, here are some of the tips to keep in mind:

Choose the Countertop before Anything Else

As you remodel your kitchen there will be a million things that you will need to do. The decoration ideas are simply endless and it’s all about figuring out the perfect blend for your kitchen. However, before you settle on anything, you need to pick the countertop. It’s the first thing that should be on your mind and the rest of the décor will be determined by the choice you make.

Make Sure That the Countertops Work with the Other Finishes

It’s important to also make sure that your countertop works with the other finishes in your home. Unless you are remodeling your entire home, you need to pay attention to this. Some homes are often quite unique when it comes to finishing. Installing a countertop that doesn’t go with the other finishes can affect the entire décor system.

Don’t Overlook Tile painting contractors Modesto, CA

There is no doubt that various homeowners have their preferred tastes when it comes to the countertop that they want to install in their kitchen. However, there are a few common countertop options that most people go for. But tile countertop designs are often ignored. Don’t make this mistake. Even if you don’t end up installing the tile countertop, at least make sure you give it a serious consideration.

Get Creative with Backsplashes

The backsplash is indeed an important part of the kitchen and it has to be incorporated into your remodeling plan. Creativity here will be your biggest asset. But don’t do your own things. The rule of thumb is to make sure that the backsplash goes very well with the chosen countertop and the overall kitchen décor. Even though you are allowed to be as creative as you want, don’t go overboard.

You Don’t Have to Use the Same Material Everywhere

There’s nothing wrong with mixing things up a little. Although many homeowners often use the same countertop materials all over the kitchen, experts say that using two or three different types of materials will actually have an added advantage. For example, you can use durable countertop materials like granite around the sink or areas where the stains are likely to occur. On other areas, porous materials like marble will do. This pattern of different materials will add a lot of class and beauty to your kitchen.

The idea of remodeling your kitchen and making it classy takes a lot of effort but once you get the Modesto painters right, you won’t have any issues. Take advantage of the tips above and you will be fine.

The best way to Paint Foam Composite Trim

As you remodel the the outside of your house to include vinyl siding or one of the maintenance- sidings on the marketplace, you need to include trim which is maintenance-free. Products are available in light-weight foam formulas made from polypropylene, polyurethane, polystyrene and polyvinyl chloride. The bulk of them are available in white while these trims come in many different profiles. In the event that you would like another color trim, it’s required for that you paint this foam composite trim. By painting the trim that is composite, it is possible to enhance the look of your house also as add to its worth.

A rag soaked in mineral spirits or alcohol over the period of the completed side of the foam trim. Allow the alcohol time to dry. It won’t consider extended. This action eliminates any solvent-based chemicals that create a waxy-like movie that stays on the trim in the manufacturing process.

Mix several drops of dish detergent in a gallon bucket of water that is warm. Wipe this combination over the the top of foam composite trim to complete washing-off grime or any chemicals that stays on the area. Rinse with clear water. Let the air that is trim dry.

Sand the area of the foam trim with 220-grit sandpaper. You don’t need to sand the part of the trim that you aren’t painting. This increases the paint’s capacity to to stick to to the foam.

Wipe sandpaper grit and dirt in the trim’s surface using a tack cloth.

A coat of mildew-resistant primer to the uncovered sides of the trim. Allow the primer to dry. Drying times vary as a result of humidity and temperature.

Foam composite trim with two coats of exterior latex paint. Allow the first coat to dry before including the 2nd one.

See related

Plumbing Emergency Tips and Tricks

Piping emergencies can happen anytime. Taking immediate action can help prevent further damage before a plumber arrives. Handling emergency damages or situations with your home’s pipework will, however, require some simple tools and a few skills. Therefore, it’s important to ensure there is an emergency kit that you can use to deal with any situation.

The following are some of the tools you must have in your plumber Chico kit:

-A five gallon bucket that will be your tool holder
-A plunger and a forced cup
-A multi bit screwdriver
-You must have a few wrenches. Medium sized slip joint pliers together with an adjustable wrench will come handy
-A few blind caps to deal with a broken valve.
-An assortment of Allen keys is also highly recommended
-Ensure you also have heavy duty paper towels or some rags to clean up overflowing water

Emergency Tips to Keep In Mind

Once you have collected all the tools you need, handling Chico plumbing emergencies should be an easy task.

But there are a few things you must keep in mind.

-The first thing is to understand where the main water shut off valve is. You cannot work on any emergency if you don’t turn off the water.
-There are also isolation valves that are found in each fixture in your home. The valves are going to stop water from going into the affected pipes without stopping water flow in other parts of the home. Know how to locate these valves.
-If you are dealing with a drain line, your joint pliers will come handy. Most of the time, they will be used for loosening the collar nuts.
-Supply tube breakages should be dealt with very fast in order to avoid flooding. You can screw in a blind cap around the area leaking until the problem is permanently fixed.
-Cracked pipes can be handled using normal duct tape or even pipe sealing tape. The tape can pull together a cracked pipe. While it may not stop the leak entirely, it will reduce the intensity until a permanent solution is found.
-Clogging is a common issue too and it can be solved using a cup plunger. However, this would be ideal for smaller drains such as showers and bathtubs. If you are dealing with bigger drains such as a toilet, a force cup plunger will work just fine.

These are all basic emergency tips that will help solve the situation at hand on a temporary basis. But you will still need to call in a plumber to deal with the issue further so that a permanent fix is found.

plumbing Chico CA emergencies are very common in any home and dealing with them as soon as they happen can save you a lot of money in repairs. It doesn’t take a lot to fix emergency issues with your pipework and the simple tips above will come handy. Give them a try and you will be glad you did.

The best way to Grow Onion Tops

Onions grow all through every zone in The United States as annuals. Also called green onions, onion tops develop and don’t mature into big bulbs. Tops are harvested throughout all the year from every bulb.

Soil

Like soil that is rich, therefore in the event the value of your soil is in issue, include a 2 inch layer of well-rotted compost to the top 6″ of soil. Loose soil creates the finest onion crops, therefore split up soil clumps in to pea-sized particles. Remove grass and weeds in the planting location to lessen competition for moisture and soil nutrients.

Planting

Drag a stick on the other side of the soil to produce straight lines one foot apart. Place each onion established on the line 3″ apart. So the stage is peeking over the soil push each bulblet below the soil. While the onion sets are sprouting keep the soil moist. Roots from shop-bought scallions and onions can be pushed to the soil to increase for the tops.

Fertilizing

Feed the onions every 2-3 months with granulated 5 10 10 Sprinkle the quantity that is suggested next to the the onions and cover using a layer of soil. Water the soil to begin the fertilizer functioning.

Harvesting

Trim the best using a pair of scissors when the onion tops would be the preferred dimensions. Tops will increase as the age that is onions. Keep tops refrigerated to to increase their shelf-life to the onion.

See related

3 Signs of a Reputable Dumpster Rental Service

Disposing waste materials can sometimes be a very difficult experience. As a homeowner, you need to find the right dumpster to ease the burden. There are many dumpster for hire services these days. Whether you are looking to clean up the garage, get rid of some construction debris, or any other trash, a good handyman Lakeland FL rental service can be of great help.

But how do you pick the right rental service?

Below are a number of signs you should look out for:

Location

The location of a handyman Lakeland service provider is very important. It’s advisable to hire dumpsters from local providers. Local providers are basically rental companies that can be accessed easily. Using a local rental service reduces the overall costs too. It also makes the whole process of renting a dumpster easier.

As you begin searching for a quality dumpster to rent, limit your choice to local companies. Besides, a local company will have firsthand knowledge of waste disposal laws or rules in your area.

Cost of Service

Different dumpster providers will have their own unique way of pricing. A good dumpster for rent service should put everything on the table. They should break down the costs in a simple manner. This will ensure that you have a clear budget the moment you decide to rent your dumpster. In addition to this, also make sure there are no hidden fees involved.

Some companies might charge you extra for truck mileages or hours. Although this is not necessarily a bad thing, it’s very important to know it upfront. The great thing is that with the huge number of options available in dumpster renting, it’s very easy to find a provider that meets your budget. However, always pick a dumpster that fits your needs. Pay attention to the size in particular. The last thing you need is to pay for a big dumpster while you only need a small one.

Delivery and Pick Up

It’s also very important to choose a dumpster service provider that’s prompt in delivering and picking up the dumpster. It shouldn’t take a day to have your dumpster delivered once you have formalized the renting process. Additionally, once the job is done, the rental service provider must avail itself in time to pick the dumpster.

The timing is always important. You want a rental service that will work within your schedule. But how do you know if a rental service will promptly deliver the dumpster? It’s easy, just read a few reviews from customers who have used the service before. The reviews will clearly tell you whether a certain rental service provider can be trusted or not.

Renting a handyman services Lakeland FL can sometimes be very stressing. However, there are so many options to go for. Keep in mind the simple tips above and you will have no trouble finding a high-quality dumpster rental service provider that will meet your needs.

15 Pool Maintenance Tips to Keep Your Pool Clean

If you have a swimming pool in your house, you will have to spend on Scottsdale plumbing from time to time. This service can eventually become costly for you, and most people end up reducing the frequency of cleaning and maintenance so that they can save money. However, there are a few things that you can do to maintain the pool without having to spend a lot in the process.

Below are some useful ideas to work with:

Check Your Water Level

Make sure the water is neither too high nor too low. For the best performance, the water level should be at the center of the pool skimmer. If it runs too low, the pump will dry and burn up. If it’s too high, your skimmer door might not be efficient.

Check the Inline Chlorinator

In case you have an inline chlorinator or an in-deck chlorinator, you must check them frequently. You should be looking for clogging, loading and the level of chlorine tablets. Depending on the features, this unit is supposed to add some chlorine to the pool.

Clean the Tile Line

You have to clean or wipe the tile line once a week. This is done to reduce the deposits that build up when the water pH is high.

Use Pool Chemicals

Make sure all pool chemicals are stored as far away from direct sunlight as possible. Acid and chlorine components should never be stored together.

Check for Cracks

Pay attention to cracks between the deck and the tiles or around the perimeter of the pool. Caulk these as soon as possible, or hire an expert to assist you.

Monitor Your Pool

Take the chemical readings of your pool from time to time, and make sure they are within an acceptable range.

The following are some of the ranges that you should be monitoring:

– Chlorine residual
– Combined chlorine
– Conditioner or cyanuric acid
– Calcium hardness
– Level of alkalinity
– pH level

Clean the Hair and Lint Pot

There should be a hair and lint pot at the front of your pool pump. Make sure you clean it as frequently as necessary. To do this, turn off the pool pump. Depending on the model you have, you might only need to clean the leaf basket or the debris catcher. A multi-speed pump will eventually be a worthy purchase.

Shock the Pool

In case you have an ozone system, the pool does not need to be shocked regularly. If necessary, do this only at night, using a non-chlorine shock, especially if you want to use the pool soon.

Keep Plants and Animals Away

Make sure you keep your pets and plants away from the pool.

Check Protective Barriers

Another important aspect of plumber Scottsdale AZ is to keep the gates and barriers safe and in place, especially for children. Your top priority must be safety.

Clean Out Skimmer Baskets

The skimmer basket is supposed to be cleaned every week, or as often as necessary. It’s found at the side of your swimming pool, and its task is to make sure contaminants and debris do not float to the end of the pool. Make sure the skimmer is cleaned all the time, because the more effective it is, the cleaner your pool will be.

Check Pool Chemistry

It’s advisable that you check the pool chemistry at least once a week. The readings should be no less than 7.2 and no more than 7.8. The lower the readings within this range, the lower the amount of chlorine you will need. This is because as the level of pH rises, the chemical action makes chlorine weaker so you might end up adding more. Besides, with the reading at 7.0, chlorine in your pool is 50% active, while it is only 10% active if the reading gets to 8.0.

Make Sure the Ozonator is Working

In case you have an Ozonator, you should ensure its light is working. The combination of UV and the ozone reduces the quantity of chlorine needed.

Check the Salt System

In case you have any salt system, or if yours is a no-chlorine pool, make sure the cell is always clean. The thing about salt systems is that they tend to push up the pool pH. As a result, you end up using more acid.

Clean the Pool Filter Regularly

The pool filter is supposed to be cleaned regularly. You should consider getting a cartridge filter which will provide a low rate of flow and very little water will be subject to wastage.