The best way to Grow Onion Tops

Onions grow all through every zone in The United States as annuals. Also called green onions, onion tops develop and don’t mature into big bulbs. Tops are harvested throughout all the year from every bulb.

Soil

Like soil that is rich, therefore in the event the value of your soil is in issue, include a 2 inch layer of well-rotted compost to the top 6″ of soil. Loose soil creates the finest onion crops, therefore split up soil clumps in to pea-sized particles. Remove grass and weeds in the planting location to lessen competition for moisture and soil nutrients.

Planting

Drag a stick on the other side of the soil to produce straight lines one foot apart. Place each onion established on the line 3″ apart. So the stage is peeking over the soil push each bulblet below the soil. While the onion sets are sprouting keep the soil moist. Roots from shop-bought scallions and onions can be pushed to the soil to increase for the tops.

Fertilizing

Feed the onions every 2-3 months with granulated 5 10 10 Sprinkle the quantity that is suggested next to the the onions and cover using a layer of soil. Water the soil to begin the fertilizer functioning.

Harvesting

Trim the best using a pair of scissors when the onion tops would be the preferred dimensions. Tops will increase as the age that is onions. Keep tops refrigerated to to increase their shelf-life to the onion.

See related

3 Signs of a Reputable Dumpster Rental Service

Disposing waste materials can sometimes be a very difficult experience. As a homeowner, you need to find the right dumpster to ease the burden. There are many dumpster for hire services these days. Whether you are looking to clean up the garage, get rid of some construction debris, or any other trash, a good handyman Lakeland FL rental service can be of great help.

But how do you pick the right rental service?

Below are a number of signs you should look out for:

Location

The location of a handyman Lakeland service provider is very important. It’s advisable to hire dumpsters from local providers. Local providers are basically rental companies that can be accessed easily. Using a local rental service reduces the overall costs too. It also makes the whole process of renting a dumpster easier.

As you begin searching for a quality dumpster to rent, limit your choice to local companies. Besides, a local company will have firsthand knowledge of waste disposal laws or rules in your area.

Cost of Service

Different dumpster providers will have their own unique way of pricing. A good dumpster for rent service should put everything on the table. They should break down the costs in a simple manner. This will ensure that you have a clear budget the moment you decide to rent your dumpster. In addition to this, also make sure there are no hidden fees involved.

Some companies might charge you extra for truck mileages or hours. Although this is not necessarily a bad thing, it’s very important to know it upfront. The great thing is that with the huge number of options available in dumpster renting, it’s very easy to find a provider that meets your budget. However, always pick a dumpster that fits your needs. Pay attention to the size in particular. The last thing you need is to pay for a big dumpster while you only need a small one.

Delivery and Pick Up

It’s also very important to choose a dumpster service provider that’s prompt in delivering and picking up the dumpster. It shouldn’t take a day to have your dumpster delivered once you have formalized the renting process. Additionally, once the job is done, the rental service provider must avail itself in time to pick the dumpster.

The timing is always important. You want a rental service that will work within your schedule. But how do you know if a rental service will promptly deliver the dumpster? It’s easy, just read a few reviews from customers who have used the service before. The reviews will clearly tell you whether a certain rental service provider can be trusted or not.

Renting a handyman services Lakeland FL can sometimes be very stressing. However, there are so many options to go for. Keep in mind the simple tips above and you will have no trouble finding a high-quality dumpster rental service provider that will meet your needs.

15 Pool Maintenance Tips to Keep Your Pool Clean

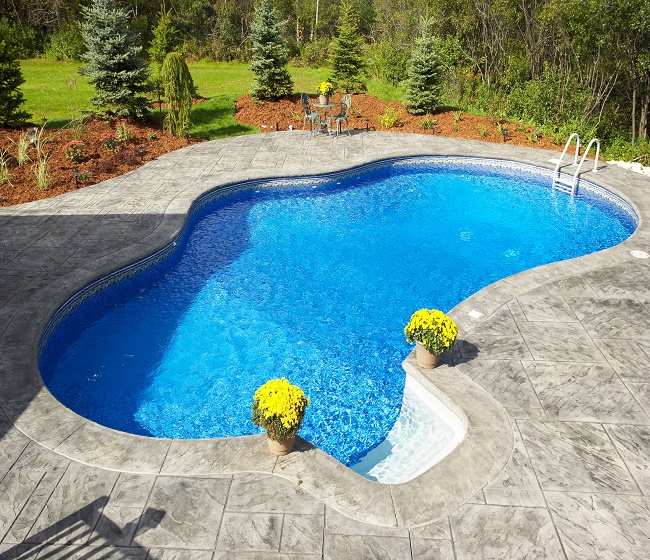
If you have a swimming pool in your house, you will have to spend on Scottsdale plumbing from time to time. This service can eventually become costly for you, and most people end up reducing the frequency of cleaning and maintenance so that they can save money. However, there are a few things that you can do to maintain the pool without having to spend a lot in the process.

Below are some useful ideas to work with:

Check Your Water Level

Make sure the water is neither too high nor too low. For the best performance, the water level should be at the center of the pool skimmer. If it runs too low, the pump will dry and burn up. If it’s too high, your skimmer door might not be efficient.

Check the Inline Chlorinator

In case you have an inline chlorinator or an in-deck chlorinator, you must check them frequently. You should be looking for clogging, loading and the level of chlorine tablets. Depending on the features, this unit is supposed to add some chlorine to the pool.

Clean the Tile Line

You have to clean or wipe the tile line once a week. This is done to reduce the deposits that build up when the water pH is high.

Use Pool Chemicals

Make sure all pool chemicals are stored as far away from direct sunlight as possible. Acid and chlorine components should never be stored together.

Check for Cracks

Pay attention to cracks between the deck and the tiles or around the perimeter of the pool. Caulk these as soon as possible, or hire an expert to assist you.

Monitor Your Pool

Take the chemical readings of your pool from time to time, and make sure they are within an acceptable range.

The following are some of the ranges that you should be monitoring:

– Chlorine residual
– Combined chlorine
– Conditioner or cyanuric acid
– Calcium hardness
– Level of alkalinity
– pH level

Clean the Hair and Lint Pot

There should be a hair and lint pot at the front of your pool pump. Make sure you clean it as frequently as necessary. To do this, turn off the pool pump. Depending on the model you have, you might only need to clean the leaf basket or the debris catcher. A multi-speed pump will eventually be a worthy purchase.

Shock the Pool

In case you have an ozone system, the pool does not need to be shocked regularly. If necessary, do this only at night, using a non-chlorine shock, especially if you want to use the pool soon.

Keep Plants and Animals Away

Make sure you keep your pets and plants away from the pool.

Check Protective Barriers

Another important aspect of plumber Scottsdale AZ is to keep the gates and barriers safe and in place, especially for children. Your top priority must be safety.

Clean Out Skimmer Baskets

The skimmer basket is supposed to be cleaned every week, or as often as necessary. It’s found at the side of your swimming pool, and its task is to make sure contaminants and debris do not float to the end of the pool. Make sure the skimmer is cleaned all the time, because the more effective it is, the cleaner your pool will be.

Check Pool Chemistry

It’s advisable that you check the pool chemistry at least once a week. The readings should be no less than 7.2 and no more than 7.8. The lower the readings within this range, the lower the amount of chlorine you will need. This is because as the level of pH rises, the chemical action makes chlorine weaker so you might end up adding more. Besides, with the reading at 7.0, chlorine in your pool is 50% active, while it is only 10% active if the reading gets to 8.0.

Make Sure the Ozonator is Working

In case you have an Ozonator, you should ensure its light is working. The combination of UV and the ozone reduces the quantity of chlorine needed.

Check the Salt System

In case you have any salt system, or if yours is a no-chlorine pool, make sure the cell is always clean. The thing about salt systems is that they tend to push up the pool pH. As a result, you end up using more acid.

Clean the Pool Filter Regularly

The pool filter is supposed to be cleaned regularly. You should consider getting a cartridge filter which will provide a low rate of flow and very little water will be subject to wastage.

Methods of Seed Germination

Germination is the method a seed undergoes when it starts to develop into a plant. When the circumstances are proper because of their variety seeds germinate — oxygen and moisture should be present and the atmosphere should be in the correct temperature. By merely planting those in the soil, some seeds will germinate effortlessly, but the others might require aid to germinate on-schedule. Research your plant selection that is specific to seek out your seeds’ germination requirements.

Planting

The seeds which are most easy to develop are those that merely germinate when they are planted by you in the environment that is right. Generally, bigger seeds require to be planted deeper than ones that are smaller, but examine the back of your seed packet to find out the proper planting depth for the seeds. Plant the seeds, firming the soil to to get hold of the seed area. Water the seeds and keep them moist. The seeds sprout through the the top of soil and will germinate on their own.

Cold Stratification

Some crops which are native to the Northern section of the region require a period of cold before they’ll start to germinate. While this occurs with seeds that drop to the floor in character, you’ll need to supply the cool for seeds you harvest your self. Wrap the seeds and place the towels in zip-top plastic bags. Store the bags in the fridge for the quantity of time your seeds require stratification. After after that timing h AS passed remove the seeds from your refrigerator and plant them in s Oil to germinate.

Scarification

Some seeds have a challenging outer coating which is very difficult to get an expanding root to breakthrough. While seeds get handled approximately in naturel, falling from a peak or being rubbed against rocks, gathered seeds are handled in a mo Re mild method. This will not enable water to penetrate the shell to begin the germination procedure. Scarification is the the technique through which gardeners somewhat harm the coating of a seed to permit the dampness more easy access to the the inner. Scrape the shell with a nail file or sand-paper, before planting it in s Oil or nick the seed having a knife.

Sprouting

Some seeds are consumed with their root that was sprouted as well as a stem attached and therefore are never planted in a backyard to develop into a grown-up plant. Germinate these seeds from the technique that is sprouting. Rinse the seeds and spot them in a container that is sprouting, both a jar having a bag or a lid. Moisten the seeds often to get a quantity of times through the entire day, with respect to the sort of seed you’re sprouting. You may have sprouted seeds prepared to consume in a matter of several days.

See related

The best way to Cut Wall Paneling

Wall paneling needs to be cut using methods and specific blades to make sure that it will not chip. Care should be taken to preserve a 90-degree account retaining straight lines which are visible. It’s possible for you to add some character to your own home by even adding paneling into a section of wall for an accent or including wainscoting produced from paneling. You should use a tablesaw to cut paneling.

Blade Choice

Install a panel- a cabinet-maker cross-cut blade on a tablesaw or slicing blade, a blade that is laminate. Raise the blade to 1-inch in the tip of the tooth that is very best, to the idea where the blade emerges in the table. Saw blades are the greatest issue when reducing paneling. The blade that is incorrect splinter and will chip the fragile edges of paneling. Most dining table saw blades are made to reduce deep and quick. They’ve teeth that slice and tear wood. Panel-cutting blades, cross-cut and laminate blades have short teeth that will not chip paneling effortlessly.

Table Saw setup

Measure width or the size which you wish to cut from a sheet of paneling. Set the fence. You parallel to the grain or can cut over the grain. If you’re planning to slice the both instructions to the paneling, it is recommended to cut across or perpendicular the grain because it is simpler to manage a complete sheet of paneling in this way. In the event that you rip a sheet length-wise right into a slim piece, after that it becomes becomes quite difficult for the reason that it becomes floppy and hard to manage, to reduce it to size. Constantly make sure there are saw-horses in entrance and beside the observed to to aid the paneling when reducing paneling on a dining table observed.

Chipping

Mark the entrypoint along with the ex IT point-of the noticed blade on the paneling. Stretch a bit of masking tape from both points of the measurement, and press it down tight. The thought is s O the blade will reduce down through the guts of the tape. The tape stops the blade from splintering or chipping the fringe of of the paneling. The ex IT factors of the blade are moving-in an upward movement as the saw blade passes throughout the paneling. They’ll chip the area off the paneling in the event the teeth occur to catch on-the-edge of the paneling as it ex ITs the blade. The tape stops the paneling from chipping

Technique

Place the paneling on the noticed. Place one-hand on the paneling on both sides of the blade. As you maintain it push back on the paneling. Push the paneling ahead over the blade before the blade emerges out the again of tape and the paneling. One hand should pass to the proper side of the blade on the left and one. Let go of the paneling and change the noticed off. The the thing when slicing paneling is consistently and to move easy. Jerky or stopping actions reduce or can burn up tiny divots in along side it of the paneling. It could also direct to cuts which might be not square.

See related

Here's Why You Need A Residential Window Tint

As energy prices increase year after year, more and more homeowners are now on the lookout for good ways to save money on utility bills. Most of them opt for the addition of insulation in their homes. Some also replace their old appliances with newer ones which are already made to be eco-friendly. Another option is to switch to light bulbs that are considered as “energy saving.” However, not a lot of homeowners realize that they actually lose a lot of money because of the energy that’s lost through their window companies.

At least 30% of the heating and cooling of a home is lost through an ineffective window treatment or the window itself. A portion of the loss may be due to air leakage through the window installation. But, a huge portion of the loss is due to the heat that constantly flows through the windows’ glass and frame. You can reduce the energy loss by replacing your windows with energy-efficient ones. However, not all of us can afford the replacement of windows as it surely costs thousands of dollars. A good alternative that’s already a good solution would be the addition of a residential window replacement.

Window Tint – Insulation

In colder months, residential window tinting can help prevent heat from escaping your home through your window cleaning. A tint acts as a layer of insulation as it prevents heat loss while still allowing visible light to get in. You won’t have to worry about your home getting dim because a window tint can still be able to make your home’s interior bright.

During warmer months, the sun’s heat will enter through the many windows of your home. This will cause your AC to work even harder just to keep you cool inside your home. A window tint will block no less than 99% of the UV rays of the sun. With the window tint’s insulation effect as well as its ability to ensure UV rays won’t be able to enter you home, the heat from outside won’t enter through your windows’ glass. Cool air that’s from your AC will also be kept inside.

The insulation properties of a window tint greatly help in equalizing your home’s temperature. In turn, the heating and cooling system that you use in your home won’t have to work hard just to maintain the temperature that you want. You won’t just be able to reduce your energy costs but you’ll make your home much more comfortable as you’ve eliminated large temperature fluctuations.

Additional Benefits

By blocking the harmful UV rays of the sun, your possessions such as your valuable pieces of furniture will have less chances of getting damaged. Direct exposure to sunlight can cause fading, premature aging, and disintegrating for some materials. For sensitive electronics, UV rays will cause damage. With a residential window repair, you’ll preserve the quality and condition of your household items.

If you are ready to benefit from a residential window tint, then don’t hesitate to seek the help of professionals. They will ensure that you will enjoy all the advantages that a residential window tint brings about.

The best way to Plant Pink Yucca

Pink yucca (Hesperaloe parviflora), also called coral yucca or fake red yucca, is a succulent perennial that will withstand intense heat and drought, and endure temperatures below 0 degrees. Growing in Sunset’s Hardiness Zones 10 through 21, the pink yucca thrives in full sunlight and isn’t picky about soil types as long as it’s well-drained. Throughout the summer, it generates spikes coated in coral blooms that are pink-ish. The humming-bird-attracting blooms make a long and striking lasting addition. These features of the yucca that is pink make it a flexible and trouble-free addition to gardens and landscapes with different needs.

Fill a seed tray that’s personal sections with about 4-to 5″ of cactus potting mix. Water the mix lightly with water till it’s moist but not soggy. If using plain tap water, let the water sit in cup or the watering can for at least an hour to enable the chlorine to dissipate before utilizing it.

Place the tray in an even area between 80 and 90-degrees with complete, in-direct sunlight and temperatures preferably. Consider putting the tray along with a seed-heating mat to supply the soil with bottom warmth that is helpful.

Sow the yucca seeds beneath the mix area. Water the soil lightly before the seeds germinate, when the soil starts to dry, or at which time you need to cut back the amount of watering to every a few days times.

Remove the seedlings in the seed tray when they’ve three to four leaves. Use a spoon to scoop the seedling from the soil using its root ball intact. Refrain from keeping the seedling by its own stem. Transplant person seedlings in to 3- or 4 inch peat pots.

The soil starts to feel dry water the seedlings in the peat pots. Continue to keep the seedlings in total, in direct sunlight.

Place the yucca plants that are little outside for two hours on a relaxed day in an area with partial sunshine. Continue inserting the crops that are young outside on warm times for fourteen days, extending the time body by two hrs every day. This can be called “hardening-off” and will aid prepare the pink yucca for the backyard transplant.

When they attain heights around 18-inches the flower bed for the yucca seedlings. Use a backyard trowel to dig a trench the amount of the flower bed 6 to 10-inches deep. Add less than six inches of organic mulch to the first soil. Use the backyard trowel to to combine the s Oil and mulch.

The fringe of of the peat pots to even using the potting blend. Dig a hole in the soil twice pots. Plant the yucca that is pink, pot and all, using the soil, since the the roots entirely in the hole. Space each plant 4to 5 toes apart. Water the yucca seriously soon after after planting.

Before the yucca is is set up provide a-T least 1inch of water and water in the event the soil is dry. Water the pink yucca about twice a week when foliage is current, because this plant’s foliage is semi-succulent and could go dormant under ex-treme drought problems.

Feed the yucca a total water soluble fertilizer once a yr when the plant displays indicators of new progress. Consider inserting several layers of mulch across the yucca that is pink keep dampness in the floor and to pro Tect its roots. Avoid inserting the mulch immediately contrary to the foot of the yucca and as an alternative keep it 2 to 3″ a way from it.

See related

The best way to Care for a Japanese Snowbell Tree

The Japanese snowbell tree (Styrax japonicus), also occasionally known as the Japanese snowdrop tree, is hardy in Sunset’s Environment Zones 4 to 9, 14 to 21, 32 to 34 and 39. This native of China, Japan and Korea got its its title in the delicate bell shaped flowers produced in spring-time. The blossoms are aromatic. As the leaves angle in the branches and flowers dangle down, the tree assumes the impact of having parallel tiers that are white and green when in bloom. They are able to take on a spread of 30-feet or even more, when young snowbell trees tend to have a slender form, but as specimens attain their mature height of 30 feet. This tree gives the advantages of a stylish grey- bark and colourful fall foliage. The range “Pink Chimes” has light-pink flowers.

Plant a snowbell in an area where it is going to receive partial to full sunlight and where it’s sheltered from strong winds. Don’t website the tree also near to your shrub or a different tree that can cramp its development. The Japanese snowbell wants enough space to distribute since its branches tend to grow horizontally.

Supply the tree with continuously or damp moist soil which is well-drained. It prefers a soil which is acidic to alkaline. Amend the soil with peat or other natural materials.

Keep the tree -watered, especially in its first year as its root program is established by it.

Feed the snowbell using a general purpose fertilizer in accordance with package directions prior to it commences development in the spring.

Prune to form the tree’s development with sharp pruning shears. The greatest time is in early spring or late-winter. In the event that you want the Japanese snowbell to suppose a more tree-like form prune branches all of the solution to the trunk on specimens. Otherwise, it’s going to tend to accept the appearance of a shrub that is extremely huge.

See related

The best way to Create a Limelight Hydrangea more bushy

The Lime-Light hydrangea (Hydrangea paniculata “Lime-Light”) is a cold-hardy hydrangea with showy blossoms 6 to 8″ wide that include an amazing blaze of colour to your border or backyard. Colour is changed by the blossoms throughout the growing period, turning to pink in summer from chartreuse in the spring. So that you can go dormant, a necessity for this to create blossoms Limelight needs some great winter months. It’s possible for you to grow it in Sunset’s climate zones 8, 9 and 14 through 17.

Limelight Pruning Essentials

Limelight requires pruning properly, making it a great decorative for an in-experienced gardener. It’s possible for you to prune it to any form you want plus it’s going to recover nicely.The inside of Limelights are ordinarily trimmed only to remove branches that cross or to form the plant. You need to prune them in winter, the fall or early in the spring. When they blooming don’t prune these. Small is grown by the branches in the summer therefore pruning them does little to produce a more bushy plant.

Deadheading Essentials

More shoots will develop making the plant more dense when you prune a branch again to wholesome branch or bud. This practice is called heading again. It’s possible for you to shape the improved density by reducing to buds that develop outward or inward to form the plant. Leave the one in the suggestion of the branch, the very best bud, facing. Whether there are two buds opposite each other eliminate one. They’ll form a forked stem should you allow them develop. It could block sunlight required on the the inside of the plant, when your bush is also dense on best.

Severe Pruning

One way to create a Lime-Light to develop more densely is prune it back significantly. The plant will recover, developing branches that can yield blossoms. The difficulty with serious pruning to improve bushiness is the blossoms split them and may possibly weigh also significantly for the dimension of the recently developed branches.

Changing a Tree to your Bush

Paniculatas are the hydrangeas which can be developed as a tree. This can be completed by enabling the leading branches and the trunk to increase. You also want it to revert to some bush and for those who have have cultivated a Lime-Light, reduce it close to the floor also it’s going to grow straight back as a shrub.

See related

The best way to Germinate Mulberry Trees

Mulberry trees (Morus) come in black, white and red types. They like full sunlight and develop in all of the Environment Zones of Sunset. Mulberries really are a delicious fresh fruit for both birds and individuals. Trees may be propagated from grafts, cuttings or seeds. Seedlings are located throughout the root of the tree, expanding from seeds that go through the method. Seeds must be planted as quickly as they have been gathered in places that have moderate, frost free winters. They are able to be germinated indoors before planting.

When they’re ripe gather mulberries by the end of the period. Plenty of berries, as not all of the seeds will germinate.

Soak the berries in water for 2-4 hrs to soften them. Drain the water and mash the berries to expose the seeds. Pick the seeds out independently, or add water to the fresh fruit that is mashed and most of the seeds will float to the area, along with pulp in the berries.

Rinse the seeds and spread them out in a shady place to air-dry. Once dry, rinse the seeds again. Dampen a piece of filter paper with water that is distilled. Put paper and the seeds in a plastic bag and place them in the fridge. Leave the seeds in the fridge for 60 to 100 times. Replace the filter paper that is moist as required.

Remove the seeds in the refrigerator at the conclusion of the 60 to 100 times. Prepare a tray having a blend of equal parts soil, perlite and peat. Place the seeds beneath the soil area. Water the seeds before the soil is moist. Keep the seeds at around 86 degrees Fahrenheit throughout the day for 8 hrs and 68 degrees Fahrenheit for 16 hrs at night. Use a heat lamp if required. Give mild to get a minimum of 8 hrs a day to the seeds. Check water as required and soil moisture each day.

Check seeds every 2 weeks for germination. Pick out the seeds as so on as roots seem. The roots are lengthier roots are easier to harm and fragile. Transplant the seeds in to personal pots, a the least 4″, to provide them with area to develop into seedlings. Keep the personal pots in the sam-e problems as the seeds during months there’s threat of of frost. The pots may be moved outdoors to some sunny location, when there’s absolutely no danger of freezing. Water weekly to keep the s Oil moist. In 1 2 to a couple of years the seedlings will be large enough to go on to for their permanent location.

See related